之前做过一款像素图片转化器,这几天写 three.js 的文章时突发奇想,感觉可以在 three.js 中也丢一个像素图进去。不过丢什么呢,兔年当然是兔子了。
像素数据
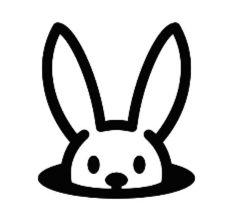
随手找了一张简单的兔子图片,首先我们需要将图片中的像素数据取出,这里就直接使用我的像素转换器了,在代码中稍微添加一点点代码就可以将该图片的像素信息取出来了:
const outputShadow = (size: number) => {
    const shadowArr = [];
    const ratio = imageDOM.naturalHeight / imageDOM.naturalWidth;
    let a = [];
    for (let y = 0; y < precision * ratio; y++) {
        for (let x = 0; x < precision; x++) {
            const p = offscreenCtx.getImageData(x, y, 1, 1).data;
            if (dropTransparent && p[3] === 0) {
                continue;
            }
            if (dropWhite && p[3] !== 0 && p[0] === 255 && p[1] === 255 && p[2] === 255) {
                continue;
            }
            const colorInfo = [...p];
            colorInfo.length = 4;
            const color = dropAlpha
                ? '#' + ('000000' + rgbToHex(p[0], p[1], p[2])).slice(-6)
                : `rgba(${colorInfo.map((v, i) => (i === 3 ? +(v / 255).toFixed(3) : v)).join(',')})`;
            shadowArr.push(
                `${color} ${x * size}px ${y * size}px` + (!textShadow && y === 0 && x === 0 ? ` 0 ${size}px inset` : '')
            );
            a.push({ x, y });
        }
    }
    console.log(a);

    return shadowArr.join(',');
};
取出的信息格式如下:
const blockMap = [
    { x: 17, y: 6 },
    { x: 18, y: 6 },
    { x: 19, y: 6 },
    { x: 20, y: 6 },
    { x: 55, y: 6 },
    { x: 56, y: 6 },
    { x: 57, y: 6 }
    // ...
];
渲染方块
在 three.js 中渲染方块需要使用到 BoxGeometry,BoxGeometry 可以绘制 3D 的立体方形,传入长宽高即可:
function getBox(w, h, d) {
    let geometry = new THREE.BoxGeometry(w, h, d);
    let material = new THREE.MeshPhongMaterial({
        color: 'rgb(120, 120, 120)'
    });
    let mesh = new THREE.Mesh(geometry, material);
    mesh.castShadow = true;

    return mesh;
}
创建一个 getBox 函数,然后通过 BoxGeometry 和 MeshPhongMaterial 即可创建一个简单的方块格。
渲染兔子
要渲染兔子,我们只需要将刚刚我们生成的像素信息进行遍历生成即可:
function getMapBoxGrid(map, separationMultiplier) {
    let group = new THREE.Group();
    for (let i = 0; i < map.length; i++) {
        const { x, y } = map[i];
        let obj = getBox(1, 1, 1);
        obj.position.x = x * separationMultiplier;
        obj.position.y = obj.geometry.parameters.height / 2;
        obj.position.z = y * separationMultiplier;
        group.add(obj);
    }

    group.position.z = -(separationMultiplier * (49 - 1)) / 2;
    group.position.x = -(separationMultiplier * (64 - 1)) / 2;

    return group;
}
此处我们通过 Group 将所有的方块组合在一起,这样可以方便进行统一的位置管理。然后我们将方块添加到 scene 中即可:
let boxGrid = getMapBoxGrid(blockMap, 1.2);
scene.add(boxGrid);
光线
为了让方块展示出来,我们可以使用光线,这里使用 DirectionalLight。
function getDirectionalLight(intensity) {
    let light = new THREE.DirectionalLight(0xffffff, intensity);
    light.castShadow = true;

    light.shadow.camera.left = -10;
    light.shadow.camera.bottom = -10;
    light.shadow.camera.right = 10;
    light.shadow.camera.top = 10;

    return light;
}
同样记得添加到 scene 中:
let directionalLight = getDirectionalLight(1);
scene.add(directionalLight);
摄像头
最后需要注意的是摄像头的位置,我们需要调整一下摄像头的位置方便进来页面就能看到我们的像素小兔兔。
let camera = new THREE.PerspectiveCamera(45, window.innerWidth / window.innerHeight, 1, 1000);

camera.position.x = 0;
camera.position.y = 200;
camera.position.z = 0;

camera.lookAt(new THREE.Vector3(0, 0, 0));
好了,一个方块组成的兔子画作就完成了,可喜可贺,可喜可贺。
最后
源码地址:https://github.com/ZxBing0066/playground-public/tree/master/websites/three-js-rabbit-block